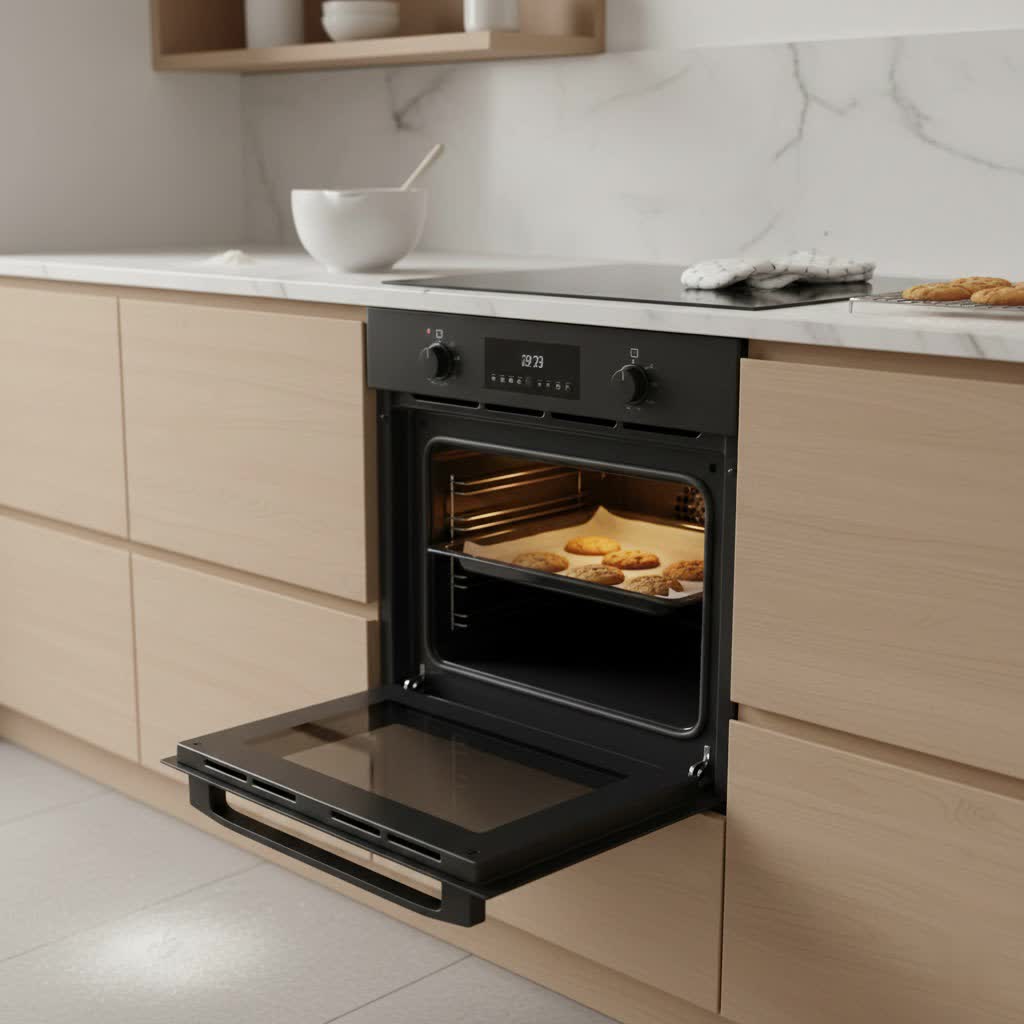
Discovering melted plastic fused to the bottom of your oven can be a jarring experience, leaving behind a sticky mess and a lingering odor. More than just an eyesore, melted plastic can release harmful fumes, making prompt and safe removal crucial. Many home cooks have faced this common kitchen mishap, often due to an accidental item left inside or an oversight during preheating. While the situation might seem daunting, restoring your oven to pristine condition is achievable with the right approach and a few essential tools. This guide will walk you through proven, safe, and effective methods to tackle that stubborn melted plastic, ensuring your oven is clean and ready for your next culinary creation without compromising your health or appliance.
Safety First: Before You Begin
Before attempting to remove any melted plastic from your oven, prioritizing safety is paramount. The fumes released by hot or burning plastic can be toxic, and sharp tools or hot surfaces pose risks. Taking a few crucial precautions will protect both you and your appliance throughout the cleaning process.
Ventilation is Key
Table is empty.Ensure your kitchen is well-ventilated before, during, and after the cleaning process. Open windows and doors, and turn on any kitchen exhaust fans. This helps to dissipate any lingering fumes from the melted plastic and from cleaning agents you might use. Good airflow is critical for your respiratory health.
Turn Off and Disconnect Power
Always ensure your oven is completely off and cooled down before you start working. For maximum safety, it’s highly recommended to unplug the oven from its power source or turn off the circuit breaker that supplies power to the oven. This prevents accidental activation or electrical hazards.
Personal Protective Equipment
Protect your hands and eyes from potential chemical exposure or sharp edges. Wear sturdy rubber gloves to shield your skin from cleaning solutions and plastic residue. Safety glasses or goggles are also advisable to protect your eyes from debris or splashes during scraping and cleaning.
Understanding Fumes
Melted plastic can release various chemicals, some of which are harmful if inhaled. While cleaning a cold oven, the immediate danger of toxic fumes is reduced. However, if the plastic melted while the oven was hot, ensure the oven has cooled and the area is well-ventilated before approaching. If you experience dizziness, nausea, or respiratory irritation, move to fresh air immediately and seek medical attention if symptoms persist.
Essential Tools and Materials
Having the right equipment on hand will make the removal process smoother and more effective. Many of these items are common household staples, ensuring you can tackle the problem without a special trip to the store.
To effectively remove melted plastic, gather the following:
- Ice packs or a bag of ice: Essential for the “cold” method to harden the plastic.
- Razor blade scraper or sturdy plastic/wooden scraper: For chipping away hardened plastic or gently pushing softened plastic. Avoid metal scrapers on enamel or porcelain finishes.
- Wooden spoon or spatula: Ideal for scraping softened plastic without scratching oven surfaces.
- Oven cleaner (optional): For stubborn residue, choose a fume-free formula if possible.
- Baking soda: A natural abrasive for creating a cleaning paste.
- White vinegar: To combine with baking soda for a powerful cleaning reaction.
- Dish soap: For general cleaning and degreasing after plastic removal.
- Paper towels or clean rags: For wiping, drying, and removing residue.
- Rubber gloves: To protect your hands from chemicals and sharp edges.
- Safety glasses/goggles: To protect your eyes from debris.
Method 1: The Cold (Ice) Approach
The cold method is often the preferred choice for removing melted plastic, especially when the plastic has already hardened. It leverages the principle that extreme cold makes most plastics brittle, allowing them to be chipped away more easily.
This method is best utilized when the plastic has completely cooled and solidified. If the plastic is still soft or gooey, allow the oven to cool entirely before attempting this technique. It’s particularly effective for large, solid pieces of plastic.
To execute the cold method, place a bag of ice or an ice pack directly onto the melted plastic. Allow it to sit for at least 30 minutes, or until the plastic becomes very hard and brittle. Once thoroughly chilled, use a razor blade scraper (if your oven has a durable surface) or a wooden/plastic scraper to carefully chip away the hardened plastic. Apply gentle, steady pressure, working from the edges inward. The goal is to break the plastic into manageable pieces that can be lifted away.
| Feature | Pros | Cons |
|---|---|---|
| Effectiveness | Highly effective for solid, brittle plastic | Less effective for gooey or soft plastic |
| Safety | Low risk of fumes; no heat involved | Can require sharp tools (razor blade) |
| Surface Damage | Low risk if using proper scraper | Higher risk if using metal on delicate finishes |
| Ease of Use | Relatively straightforward | Requires patience for plastic to chill |
Method 2: The Heat (Low Temperature) Approach
When plastic has melted into a thin, stubborn layer or is too flexible to chip away when cold, a gentle application of heat can make it pliable enough for removal. This method requires careful temperature control and specific tools to avoid damaging your oven’s interior.
This technique is most suitable for plastic that has already solidified but is not brittle enough for the ice method, or if you prefer not to use sharp tools. It works by softening the plastic just enough to scrape it off without burning it further or creating excessive fumes.
Begin by ensuring your kitchen is well-ventilated. Set your oven to the absolute lowest temperature setting (e.g., 150-200°F or 65-95°C) for just a few minutes. Monitor the plastic closely; as soon as it softens and becomes pliable, turn off the oven. Immediately, and using heat-resistant gloves, gently scrape the softened plastic with a wooden spoon, spatula, or chopstick. Avoid metal utensils as they can easily scratch the oven’s enamel or porcelain finish. Continuously wipe any plastic off your scraping tool with paper towels to prevent redepositing it.
Tackling Stubborn Residue and Stains
After removing the bulk of the melted plastic, you’ll often be left with residue, discolored stains, or a lingering odor. These remaining traces require a different approach, often involving a combination of gentle abrasives and cleaning agents to fully restore your oven’s appearance and eliminate any smells.
Baking Soda and Vinegar Paste
For a natural yet powerful cleaning solution, a paste made from baking soda and white vinegar is highly effective. Baking soda acts as a mild abrasive, while vinegar’s acidity helps break down residue and neutralize odors. This combination creates a fizzing action that aids in lifting stubborn grime.
To create the paste, mix a half-cup of baking soda with a few tablespoons of white vinegar or water until a thick, spreadable consistency is achieved. Apply this paste generously over the remaining plastic residue and any stains on the oven bottom. Allow the paste to sit for at least 30 minutes, or longer for more stubborn areas. Then, using a damp sponge or a non-abrasive scrubber, scrub the area in circular motions. The paste will help lift and loosen the residue, making it easier to wipe away.
Commercial Oven Cleaners
For extremely stubborn or burnt-on plastic residue that natural methods can’t fully remove, a commercial oven cleaner might be necessary. These products are formulated to cut through tough grease and baked-on food, and can also be effective against certain types of plastic residue.
When using a commercial oven cleaner, always read the manufacturer’s instructions carefully and ensure your kitchen is exceptionally well-ventilated. Many cleaners contain strong chemicals, so wear heavy-duty rubber gloves and safety glasses. Spray the cleaner directly onto the affected area, following the recommended dwelling time. After the specified time, wipe the area thoroughly with a damp cloth, rinsing the cloth frequently. Multiple applications and thorough rinsing may be required to remove all cleaner residue and prevent streaks.
Dish Soap and Scrubbing
For minor plastic residue or greasy marks left behind, simple dish soap and a good scrub can often do the trick. Dish soap is excellent at breaking down grease and can help lift away superficial plastic traces.
Fill a bucket with warm water and add a generous amount of dish soap. Dip a non-abrasive sponge or scrubbing pad into the soapy water and apply it to the affected area. Scrub gently but firmly in circular motions. For more ingrained spots, you may need to apply a bit of “elbow grease” and repeat the scrubbing process. Rinse the area with a clean, damp cloth until all soap residue is gone, then dry thoroughly to prevent water spots.
Step-by-Step Guide to Removing Melted Plastic from Oven Bottom
Addressing melted plastic in your oven requires a systematic approach to ensure safety, efficiency, and complete removal. By following these steps, you can effectively eliminate the plastic and restore your oven’s cleanliness.
Step 1: Prioritize Safety
Before you touch anything, ensure your oven is completely cool. Unplug the oven or switch off its circuit breaker to prevent any accidental heating. Open all windows and turn on your kitchen exhaust fan to provide ample ventilation, as fumes from melted plastic can be harmful. Don your rubber gloves and safety glasses for personal protection.
Step 2: Choose Your Method (Cold or Heat)
Assess the plastic. If it’s a thick, hardened chunk, the cold (ice) method is usually best. Place ice packs on it for 30 minutes to make it brittle. If the plastic is a thinner, more flexible film, the heat (low temperature) method might be more effective. Turn the oven to its lowest setting (150-200°F) for just a few minutes until the plastic softens, then immediately turn it off.
Step 3: Execute the Removal
For the cold method, use a razor blade scraper or a sturdy plastic scraper to carefully chip away the brittle plastic. Work gently from the edges inward. For the heat method, use a wooden spoon or spatula to gently scrape the softened plastic. Wipe your tool frequently with paper towels to avoid spreading the plastic. In both cases, aim to remove as much bulk as possible without scratching the oven’s finish.
Step 4: Clean Up Residue
Once the main plastic mass is gone, address any remaining residue or stains. Apply a paste of baking soda and a little water or white vinegar to the affected area. Let it sit for 30 minutes, then scrub with a non-abrasive sponge. For tougher spots, a commercial oven cleaner can be used, following product instructions carefully and ensuring good ventilation.
Step 5: Final Wipe Down
After scrubbing and scraping, use a clean, damp cloth to thoroughly wipe down the entire area, removing all cleaning solution and plastic remnants. Rinse the cloth frequently and wipe until the surface is spotless and free of any chemical residue. Dry the oven bottom completely with a clean towel before reconnecting power or using the oven again.
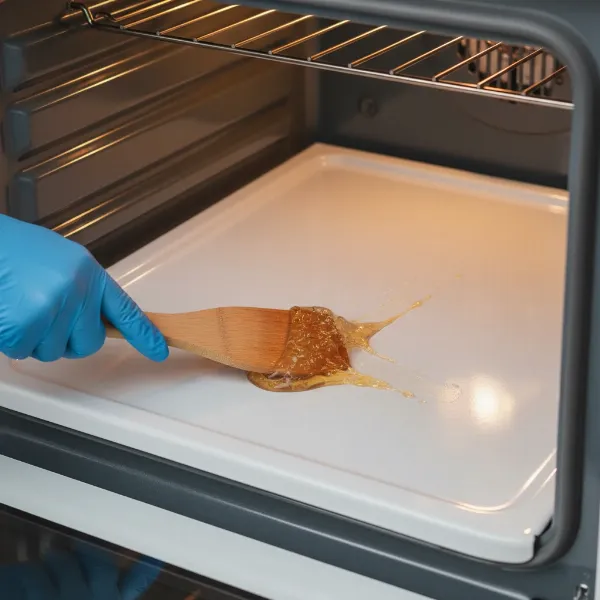 A person carefully scraping melted plastic from the bottom of an oven with a wooden spatula
Preventative Measures: Avoiding Future Plastic Mishaps
Preventing melted plastic incidents in your oven is far easier and safer than cleaning them up. A few simple habits can save you a lot of hassle and potential damage to your appliance. Being mindful of what goes into your oven can ensure smooth, plastic-free cooking experiences.
One of the most common causes of melted plastic is inadvertently leaving plastic items inside the oven when preheating. Always perform a quick visual check inside your oven before turning it on. Ensure no plastic cutting boards, food containers, or utensil handles are resting on racks or the oven bottom.
Additionally, always use only oven-safe bakeware and dishes. Many plastic-containing items, even those that seem robust, are not designed to withstand high oven temperatures. Double-check labels for phrases like “oven-safe” or “safe for temperatures up to X degrees.” When storing items in your oven for space, ensure they are removed before cooking, especially any plastics.
“A quick pre-check of your oven’s interior before every use is the simplest and most effective way to prevent the headache of melted plastic. It takes seconds but can save hours of cleaning and potential damage.” – Chef Elena Rodriguez, Culinary Arts Instructor
Conclusion
Dealing with melted plastic in your oven can initially feel overwhelming, but with the right techniques and a focus on safety, it’s a completely manageable task. Whether you opt for the chilling power of ice or the gentle softening of low heat, the key is patience and using the appropriate tools to protect your oven’s finish. Remember to always prioritize ventilation and personal protection to avoid harmful fumes.
By integrating this knowledge into your kitchen routine, you can swiftly address any future plastic mishaps and maintain a clean, safe cooking environment. A clean oven is a happy oven, ready for countless delicious meals. What new dish will you create in your now sparkling-clean oven?
Frequently Asked Questions
Is it dangerous if plastic melts in the oven?
Yes, melted plastic can release toxic fumes and unpleasant odors into your home. It’s crucial to ventilate the area immediately, turn off the oven, and avoid inhaling the fumes. Prompt and safe removal is important for both air quality and your oven’s cleanliness.
Can I use the self-cleaning cycle to remove melted plastic?
No, using the self-cleaning cycle is not recommended for melted plastic. The extremely high temperatures can bake the plastic further, creating more harmful fumes and potentially causing permanent damage to your oven’s interior or self-cleaning lining. Stick to the manual methods described.
What if the plastic is stuck to the heating element?
Removing plastic from a heating element is tricky and requires extreme caution. Ensure the oven is unplugged and cool. Do NOT scrape the element as it can be easily damaged. For minor residue, gently try to wipe it with a damp cloth. For significant amounts, it’s best to consult an appliance repair professional to avoid damaging the element.
How do I get rid of the smell after removing melted plastic?
Even after cleaning, a lingering smell can persist. Continue to ventilate your kitchen thoroughly. You can also place bowls of white vinegar or activated charcoal in the oven overnight to absorb odors. Running the empty oven on a low setting (after cleaning) for a short period with good ventilation might help burn off any microscopic remnants.
Can melted plastic damage my oven’s finish permanently?
While melted plastic can leave stains or residue, permanent damage to the oven’s finish is usually preventable if you use the correct, non-abrasive tools and methods. Avoid metal scrapers on enamel or porcelain, and be gentle. Persistent stains can often be lightened with baking soda pastes or commercial cleaners.