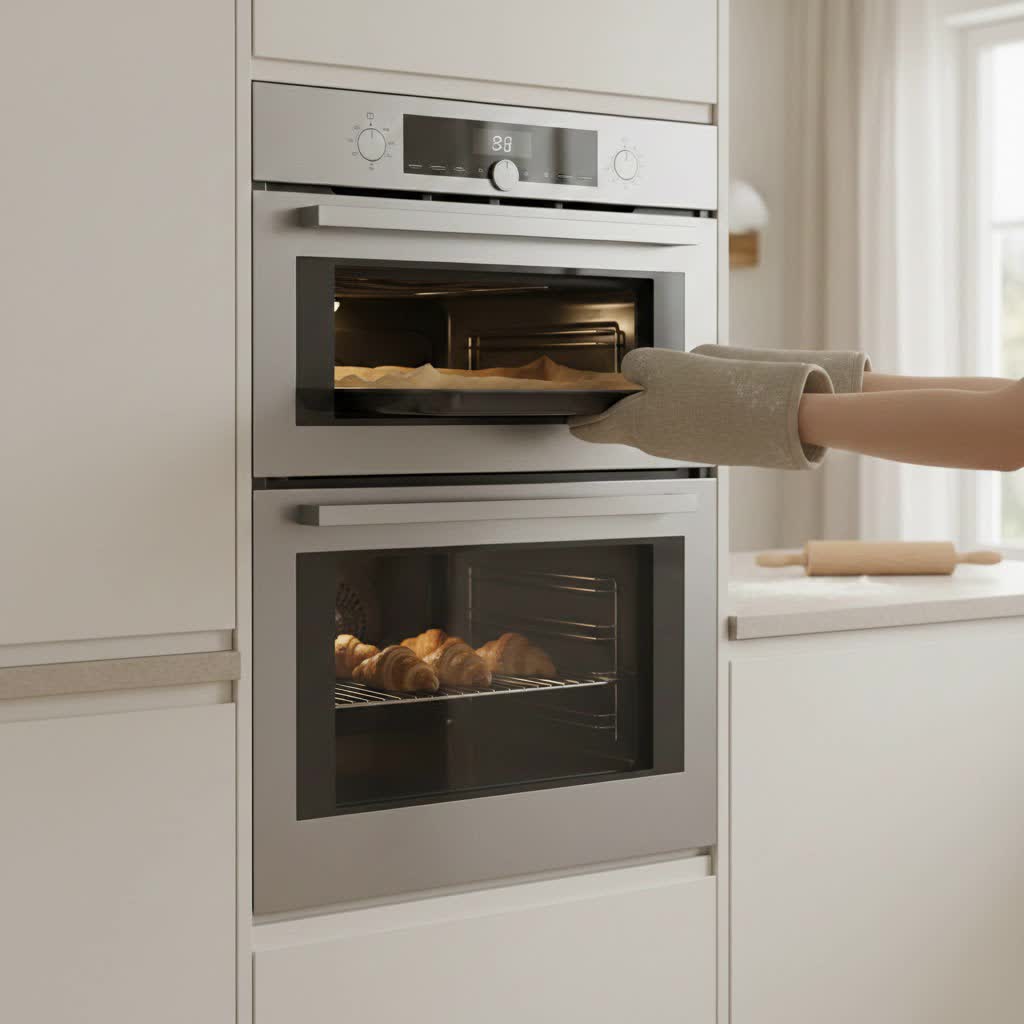
Has your oven been struggling to maintain temperature, or are your baked goods cooking unevenly? If you’re noticing heat escaping from your oven door, a worn-out door gasket is likely the culprit. This seemingly small component plays a critical role in your oven’s efficiency and cooking performance, keeping heat sealed inside where it belongs. A faulty seal not only impacts your culinary results but also increases energy consumption. The good news is that replacing an oven door gasket is a straightforward DIY project, allowing you to restore your oven’s efficiency without needing a professional. This guide will walk you through everything you need to know, from identifying a worn gasket to installing a brand new one, ensuring your oven performs at its best.
Understanding Your Oven Door Gasket: Types and Importance
An oven door gasket, often referred to as a seal, is a flexible strip designed to create a tight barrier between the oven door and the oven cavity. Its primary function is to prevent heat from escaping during operation, ensuring that the oven reaches and maintains the desired cooking temperature. Without a proper seal, heat loss can lead to longer cooking times, unevenly cooked food, and wasted energy.
Most oven gaskets are made from either braided fiberglass or rubber, chosen for their heat resistance and flexibility. These gaskets are typically mounted in one of two ways:
- Channel-Mounted: The gasket is fitted into a groove or channel around the perimeter of the oven door frame or directly on the door itself. This is the most common and easiest type to replace.
- Between Door Panels: In some oven designs, the gasket is installed between the front and back panels of the oven door. This type is generally more complex to replace and often requires professional assistance.
Understanding your gasket’s location and material will be crucial when purchasing a replacement and beginning your DIY project. A well-maintained gasket is key to an efficiently operating oven and perfect culinary outcomes.
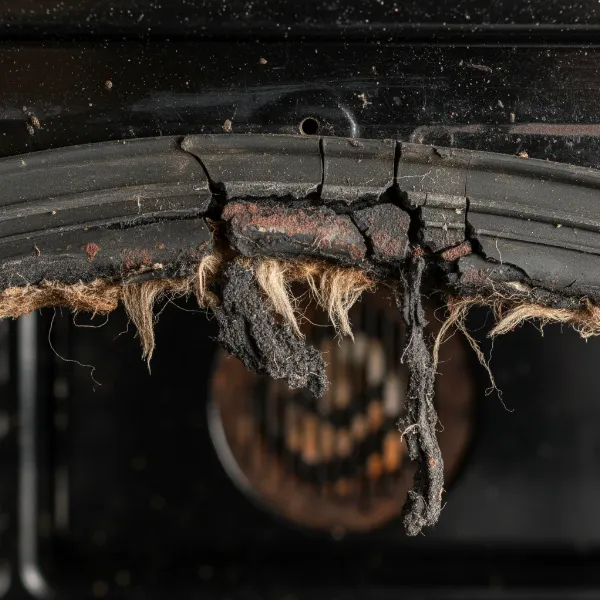 Close-up of a damaged and worn oven door gasket seal, showing cracks and frayed areas on a dark oven interior.
Signs It’s Time for a Replacement
Identifying a failing oven door gasket is essential for maintaining your oven’s performance and energy efficiency. Several indicators can signal that your gasket is no longer doing its job effectively.
The most obvious sign is a visual inspection. Open your oven door and carefully examine the gasket. Look for any visible cracks, tears, fraying, or hardening of the material. A healthy gasket should be soft and pliable, forming a continuous, unbroken seal. If it looks old, brittle, or has missing sections, it’s definitely time for a change.
Beyond visual cues, performance issues are a strong indicator. If your oven is taking longer than usual to preheat, cooking food unevenly, or struggling to reach the set temperature, a compromised gasket could be the cause. Another tell-tale sign is feeling an excessive amount of heat escaping from around the oven door when the appliance is in use. This directly points to a breach in the heat seal. Keeping an eye on these signs will help you proactively address the issue and prevent further energy waste or cooking frustrations.
Choosing the Right Replacement Gasket & Essential Tools
Before you begin the replacement process, gathering the correct tools and the right gasket is crucial for a smooth DIY experience. The most important item is, of course, the new oven door gasket itself.
To ensure you purchase the correct replacement, consult your oven’s owner’s manual or check the appliance’s model number. This information will guide you to the exact part needed, as gaskets are specific to oven models. You can typically find replacement gaskets from the oven manufacturer, specialized appliance parts stores, or online retailers. Sometimes, new gaskets can be a bit stiff; some DIYers find it helpful to gently warm the new gasket (e.g., in warm water or in the sun for a short period) to make it more pliable and easier to install, though this isn’t always necessary.
Here’s a list of essential tools you’ll need for the job:
- New oven door gasket (model-specific)
- Screwdrivers (Phillips and flathead, if your gasket is screw-mounted)
- Needle-nose pliers (useful for clips or coaxing out stubborn sections)
- Damp cloth and warm soapy water (for cleaning the gasket channel)
- Dish brush or old toothbrush (for scrubbing stubborn residue)
- Safety gloves (to protect your hands during removal and installation)
Having these items ready before you start will streamline the replacement process and ensure you can complete the task efficiently and safely.
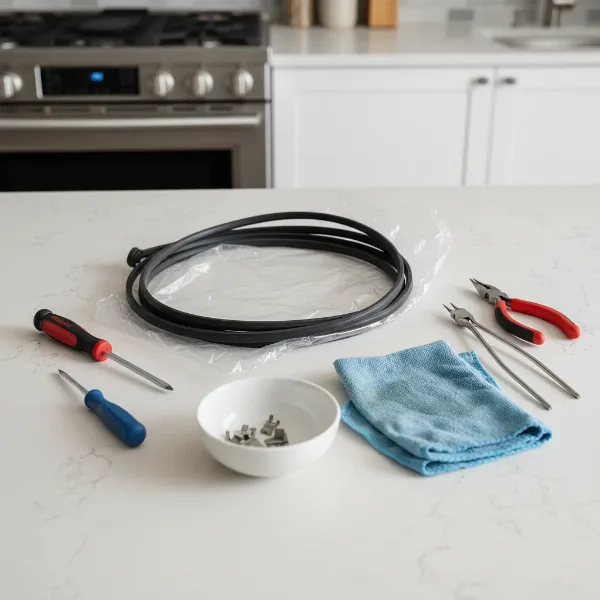 An assortment of tools neatly laid out for an oven gasket replacement, including screwdrivers, pliers, cleaning cloth, and a new gasket.
Step-by-Step DIY Oven Door Gasket Replacement Guide
Replacing your oven door gasket is a manageable project with a few key steps. Following this guide will help you ensure a proper seal and efficient oven operation.
Safety First: Disconnect Power
|
Our Picks for the Best Oven in 2026
As an Amazon Associate I earn from qualifying purchases.
|
||
| Num | Product | Action |
|---|---|---|
| 1 | BLACK+DECKER Crisp 'N Bake Air Fry Countertop Convection Toaster Oven, Medium Capacity, 4-Slice, 5-in-1, Fits 9” Pizza, 30-Min Timer, Bake, Broil, Air Fry, Toast, Keep Warm, Stainless Steel |

|
| 2 | Elite Gourmet ETO-4510M French Door 47.5Qt, 18-Slice Convection Oven 4-Control Knobs, Bake Broil Toast Rotisserie Keep Warm, Includes 2 x 12" Pizza Racks, Stainless Steel |
|
| 3 | BLACK+DECKER Crisp 'N Bake Air Fryer Toaster Oven Combo, 12 in 1 Countertop Convection Oven Cooks Food Fast, Fits a Whole Pizza or 6 Toast Slices, French Doors with Stainless Steel Finish |
|
| 4 | Ninja Air Fryer & Toaster Oven Combo | 10-in-1 Prestige Smart XL Countertop Oven | Bake up to 20 Cookies, Fit up to a 12lb Turkey | Pizza, Toast, Bake, Dehydrate | 1800 Watt | Stainless Steel | DT501 |
|
| 5 | BLACK+DECKER TO3250XSBD 8-Slice Extra Wide Convection Countertop Toaster Oven, Includes Bake Pan, Broil Rack & Toasting Rack, Stainless Steel/Black |
|
| 6 | Ninja Air Fryer Toaster Oven Combo | 8-in-1 Functionality | Flip Up & Away for Storage Space | Air Fry Basket, Sheet Pan, Wire Rack & Removable Crumb Tray |1800 Watt | Stainless Steel | SP151 |
|
| 7 | Breville BOV900BSS Smart Oven Air Fryer Pro and Convection Oven, Brushed Stainless Steel |
|
| 8 | Emeril Lagasse Extra Large French Door Air Fryer Toaster Oven Combo, 24 Cooking Functions and Digital Controls, 7 Accessories Included, Stainless Steel Finish, 26QT Capacity |
|
| 9 | Gourmia French Door Air Fryer Oven - 37 Qt Large Capacity Convection Toaster Oven, FryForce 360°, Digital Display, 12 Cooking Presets, Dehydrate, Fits 13” Pizza, Dishwasher-Safe, Stainless Steel |
|
| 10 | Cuisinart Air Fryer Toaster Oven, 1800W, 8-in-1 with Air Fry, Convection, Broil & Warm, 0.6 Cubic Feet, 60-Minute Timer, TOA-70NAS, Stainless Steel |
|
Your safety is paramount. Before touching any part of your oven, ensure it is completely cool. If your oven has been recently used, allow ample time for it to cool down. Once cool, disconnect the power supply. For electric ovens, unplug the appliance from the wall outlet or switch off the corresponding circuit breaker in your home’s electrical panel. For gas ovens, locate and turn off the gas valve connected to the appliance. This step prevents any accidental electrical shocks or gas leaks during the repair.
Remove the Old Gasket
Begin by opening your oven door fully to get clear access to the old gasket. Observe how the gasket is attached. It might be secured by screws, clips, or simply pressed into a channel using friction. If screws are present, use the appropriate screwdriver to carefully remove them. If clips are holding it in place, use needle-nose pliers to gently unclip them. For friction-fit gaskets, locate one end (often tucked into a larger hole or held by metal plates that might need unscrewing) and carefully pull the old gasket out of its channel. Take note of its original position; this will assist you in installing the new one correctly. Discard the old, worn gasket.
Clean the Gasket Channel
With the old gasket removed, you’ll expose the channel where it sits. This area often accumulates food particles, grease, and other debris over time, which can hinder the new gasket from forming a proper seal. Use a damp cloth with warm, soapy water to thoroughly clean the entire channel. For stubborn residue, a dish brush or an old toothbrush can be effective. Rinse the area well to remove any soap residue and ensure it is completely dry before proceeding to install the new gasket. A clean channel is essential for a secure and effective seal.
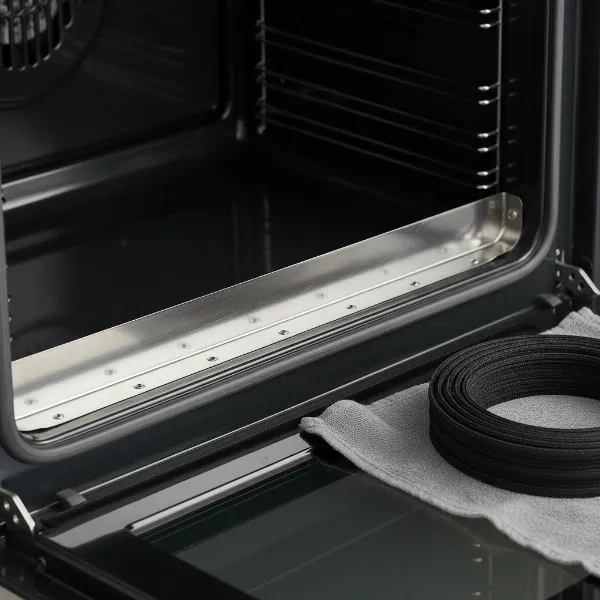 An oven door with the old gasket removed, revealing a clean and empty channel ready for a new gasket installation.
Install the New Gasket
Now it’s time to install your new oven door gasket. Begin by aligning the new gasket with the channel or mounting points where the old one was located. If your gasket uses clips, start at one end or a corner and press each clip firmly into its corresponding hole. For screw-mounted gaskets, align the gasket and fasten the screws securely. If your gasket is friction-fitted, some models suggest starting at the top center of the door frame and working your way around, pressing the gasket firmly into the channel. Ensure the gasket is evenly distributed and fully seated around the entire perimeter of the door, with no twists, kinks, or gaps. The ends of the gasket should meet neatly or fit into their designated holes or securing plates.
Test the New Seal
Once the new gasket is fully installed and all clips or screws are secure, it’s time to test your work. Close the oven door firmly. The door should close evenly and snugly against the oven frame, forming a tight seal. Visually inspect around the entire perimeter of the closed door to ensure there are no visible gaps or loose sections in the gasket. If the door doesn’t close properly or you notice gaps, re-check the gasket’s seating in the channel and ensure it isn’t twisted at any point. A proper seal is crucial for optimal oven performance.
Troubleshooting and Maintenance Tips
Even with careful installation, you might encounter a few minor issues or want to ensure the longevity of your new oven door gasket.
If the oven door initially feels stiff or doesn’t close as smoothly as you’d like, this is often normal for a new gasket. The material needs time to settle and become more flexible with use. A helpful trick is to lock the oven door shut overnight if your oven has this feature, which can help compress the gasket and encourage a better fit.
For ongoing maintenance, make it a habit to regularly inspect and clean your oven door gasket. A good time to do this is when you clean the rest of your oven or after a self-cleaning cycle (once the oven has completely cooled). Simply wipe the gasket down with a damp cloth and mild detergent to remove any food splatters or grease that can accumulate. Keeping the gasket clean helps preserve its integrity and extends its lifespan.
Remember that while most channel-mounted gasket replacements are DIY-friendly, some oven door designs have gaskets installed between two door panels. If your oven has this configuration, or if you ever smell gas from a gas oven, it’s best to consult a professional technician. Safety should always be your top priority, and a professional can handle complex installations or potential gas issues safely and effectively.
Conclusion
Replacing a worn oven door gasket is a simple yet impactful DIY project that significantly enhances your oven’s efficiency and cooking consistency. By taking the time to identify the signs of a failing seal, gathering the right tools, and following our step-by-step guide, you can confidently restore your appliance to optimal performance. A well-sealed oven means more evenly cooked meals, shorter cooking times, and noticeable savings on your energy bills. Don’t let a leaky seal hinder your culinary adventures—take control and perform this essential oven maintenance yourself. Have you checked your oven door gasket lately?
Frequently Asked Questions
How often should I replace my oven door gasket?
There isn’t a strict schedule, but typically an oven door gasket should be replaced every 5-10 years, or sooner if you notice visible damage like cracks, tears, or if heat is consistently escaping from the oven door, indicating a compromised seal.
Can I use universal door gasket material for my oven?
It is strongly recommended to use a gasket specifically designed for your oven’s make and model. Universal materials may not provide the correct fit, heat resistance, or sealing capabilities, leading to inefficient oven operation and potential safety hazards.
What happens if I don’t replace a damaged oven gasket?
Ignoring a damaged oven gasket can lead to significant heat loss, causing your oven to work harder, consume more energy, and result in unevenly cooked food or longer cooking times. It can also increase cooking costs and potentially shorten the lifespan of your appliance.