Is your oven displaying a cryptic F1 or F3 error code, leaving you wondering what went wrong with your culinary companion? These digital signals, while initially alarming, are your oven’s way of communicating a specific problem. Understanding these common error codes and knowing how to approach them can save you time, money, and the frustration of a meal unexpectedly put on hold. This guide will walk you through what F1 and F3 typically mean, common causes, and step-by-step troubleshooting you can perform, along with advice on when it’s best to call in a professional.
Understanding Common Oven Error Codes
Modern ovens are equipped with advanced diagnostics that trigger error codes when an internal fault is detected. These codes, often displayed on the control panel, act as a preliminary diagnostic tool, guiding you or a technician towards the source of a problem. While helpful, it’s crucial to remember that specific codes can vary slightly between manufacturers and models. Always consult your oven’s user manual for the most accurate interpretation for your particular appliance. A universal first step for many electronic issues, including oven error codes, is a simple power cycle. This can sometimes clear temporary glitches in the system.
Decoding F1 Oven Error Code
The F1 error code in ovens is a common signal that something is amiss within the appliance’s control or sensing system. Most frequently, an F1 error points to a fault with the Electronic Range Control (ERC), also known as the main control board, or an issue related to the oven’s temperature sensor. The control board is essentially the “brain” of your oven, managing all its functions, including temperature regulation and timing. If it encounters an unexpected signal or a component it controls isn’t responding correctly, it can trigger an F1 error.
For some oven brands, particularly certain AEG models, an F1 code might specifically indicate a “Door Not Locking” issue, often encountered during a self-clean cycle where the door needs to be securely latched. Regardless of the specific interpretation for your model, common causes include a faulty temperature sensor sending incorrect readings, compromised wiring connecting various components, or a malfunction within the control board itself. Initial troubleshooting should always begin with a simple power cycle to rule out temporary electronic hiccups. Following this, if your oven has a self-cleaning function, check the door latch for any obstructions that might prevent it from locking properly. A visual inspection of visible wiring can also sometimes reveal obvious damage.
Decoding F3 Oven Error Code
When your oven displays an F3 error code, it typically signals a problem with the oven’s temperature sensing system. This code often indicates an “open oven temperature sensor” or a “self-test error” originating from the control board, particularly in relation to temperature regulation. The oven temperature sensor, also known as a probe, is a crucial component located inside the oven cavity, constantly monitoring the internal temperature and relaying that information back to the control board.
If the F3 error appears, it usually means the control board isn’t receiving a consistent or expected signal from this sensor. This could be due to a defective temperature probe that has failed or is giving inaccurate readings, damaged or loose wiring that interrupts the communication pathway between the sensor and the control board, or a fault within the control board itself that specifically affects its ability to process temperature data. Much like with an F1 error, the first and simplest troubleshooting step is to perform a power cycle reset. Following this, you should locate the oven temperature sensor, usually a thin metal rod protruding from the back wall of the oven cavity, and visually inspect it and its surrounding wiring for any signs of damage or disconnection.
Step-by-Step DIY Troubleshooting for F1 and F3
Encountering F1 or F3 error codes can be frustrating, but many issues can be resolved with some careful DIY troubleshooting. Before attempting any repairs, always prioritize safety.
Safety First
|
Our Picks for the Best Oven in 2026
As an Amazon Associate I earn from qualifying purchases.
|
||
| Num | Product | Action |
|---|---|---|
| 1 | Cuisinart Air Fryer Toaster Oven, 1800W, 8-in-1 with Air Fry, Convection, Broil & Warm, 0.6 Cubic Feet, 60-Minute Timer, TOA-70NAS, Stainless Steel |

|
| 2 | Ninja Air Fryer Toaster Oven Combo | 8-in-1 Functionality | Flip Up & Away for Storage Space | Air Fry Basket, Sheet Pan, Wire Rack & Removable Crumb Tray |1800 Watt | Stainless Steel | SP151 |
|
| 3 | BLACK+DECKER Crisp 'N Bake Air Fry Countertop Convection Toaster Oven, Medium Capacity, 4-Slice, 5-in-1, Fits 9” Pizza, 30-Min Timer, Bake, Broil, Air Fry, Toast, Keep Warm, Stainless Steel |
|
| 4 | BLACK+DECKER Crisp 'N Bake Air Fryer Toaster Oven Combo, 12 in 1 Countertop Convection Oven Cooks Food Fast, Fits a Whole Pizza or 6 Toast Slices, French Doors with Stainless Steel Finish |
|
| 5 | Breville BOV900BSS Smart Oven Air Fryer Pro and Convection Oven, Brushed Stainless Steel |
|
| 6 | Elite Gourmet ETO-4510M French Door 47.5Qt, 18-Slice Convection Oven 4-Control Knobs, Bake Broil Toast Rotisserie Keep Warm, Includes 2 x 12" Pizza Racks, Stainless Steel |
|
| 7 | Gourmia French Door Air Fryer Oven - 37 Qt Large Capacity Convection Toaster Oven, FryForce 360°, Digital Display, 12 Cooking Presets, Dehydrate, Fits 13” Pizza, Dishwasher-Safe, Stainless Steel |
|
| 8 | Emeril Lagasse Extra Large French Door Air Fryer Toaster Oven Combo, 24 Cooking Functions and Digital Controls, 7 Accessories Included, Stainless Steel Finish, 26QT Capacity |
|
| 9 | Ninja Air Fryer & Toaster Oven Combo | 10-in-1 Prestige Smart XL Countertop Oven | Bake up to 20 Cookies, Fit up to a 12lb Turkey | Pizza, Toast, Bake, Dehydrate | 1800 Watt | Stainless Steel | DT501 |
|
| 10 | BLACK+DECKER TO3250XSBD 8-Slice Extra Wide Convection Countertop Toaster Oven, Includes Bake Pan, Broil Rack & Toasting Rack, Stainless Steel/Black |
|
Always disconnect your oven from its power source before you begin any inspection or repair work. This means unplugging it from the wall outlet or flipping the corresponding circuit breaker in your home’s electrical panel. Failing to do so can result in serious injury or electric shock.
Step 1: The Power Cycle Reset
Often, a temporary electronic glitch can trigger an error code. A power cycle reset can clear the system’s memory and reset the control board.
- Disconnect Power: Unplug the oven or turn off the circuit breaker dedicated to your oven.
- Wait: Leave the power disconnected for at least 5 minutes. This allows the electrical charge to dissipate from the control board.
- Restore Power: Plug the oven back in or switch the circuit breaker back on.
- Check: Observe if the error code has cleared. If it reappears, proceed to the next steps.
Step 2: Inspecting the Oven Temperature Sensor (Probe)
The temperature sensor is a key component for both F1 and F3 errors.
- Locate the Sensor: The oven temperature sensor is typically a small, metallic rod (about 2-3 inches long) protruding from the upper back wall, side, or top of the oven cavity.
- Visual Check: Carefully inspect the sensor and its wiring for any visible signs of damage, such as corrosion, burn marks, frayed wires, or loose connections. Ensure the sensor itself isn’t bent or broken.
- Advanced (Multimeter Test): If you’re comfortable using a multimeter, you can test the sensor’s resistance.
- Disconnect the sensor’s wiring harness from the control board (usually behind the oven’s back panel or control console).
- Set your multimeter to measure ohms (Ω).
- At room temperature (around 70-75°F or 21-24°C), the sensor should typically read between 1050 to 1100 ohms. This value can vary slightly by manufacturer, so check your manual for precise specifications.
- If the reading is significantly outside this range (e.g., extremely high, zero, or “OL” for open circuit), the sensor is likely faulty and needs replacement.
Step 3: Checking Wiring and Connections
Loose or damaged wiring can easily disrupt communication between components, leading to error codes.
- Trace Sensor Wires: Follow the wires from the temperature sensor back to the control board. Look for any kinks, pinches, or signs of wear along their path.
- Control Panel Access: You may need to remove the oven’s control panel or back panel to access the main control board and its connections.
- Inspect Connectors: Ensure all wire connectors are securely seated and free from corrosion. Gently tug on individual wires at their connectors to check for looseness.
- Keypad Ribbon Cable: In some instances, particularly if other buttons on your control panel are also acting erratically, a faulty or poorly connected keypad ribbon cable can contribute to F1 or F3 errors. If accessible, carefully disconnect the ribbon cable, inspect it for cracks, and gently clean the contacts with a pencil eraser or electronic contact cleaner before reconnecting.
Step 4: Considering a Sensor Replacement
If your multimeter test confirmed a faulty temperature sensor, or if visual inspection revealed obvious damage, replacing the probe is a relatively straightforward DIY repair for many oven models. Replacement sensors are widely available online or from appliance parts suppliers. Ensure you purchase the correct part number for your specific oven model.
Step 5: Control Board Assessment
If you’ve tested the temperature sensor, checked all wiring, and performed resets without success, the main control board (ERC) becomes the primary suspect. This is a more complex and typically more expensive repair. A faulty control board may require professional diagnosis and replacement.
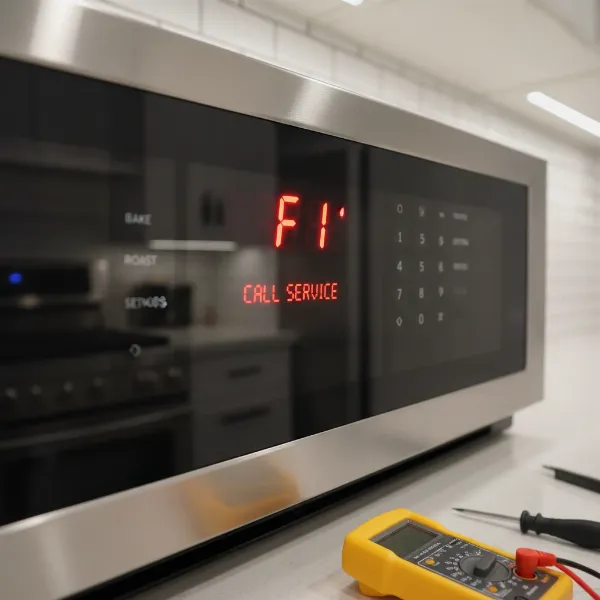 Close-up of an oven control panel displaying an F1 error code with tools for DIY repair in the foreground
When to Call a Professional Appliance Technician
While DIY troubleshooting can often resolve common oven issues, there are times when calling a professional appliance technician is the wisest and safest course of action. You should consider professional help if:
- Basic troubleshooting fails: If power cycling, sensor inspection, and wiring checks don’t clear the F1 or F3 error, the problem is likely more complex, possibly involving the control board itself.
- You’re uncomfortable with electrical work: Any repair involving electrical components carries risks. If you’re not confident in your ability to safely disconnect power, test components, or handle wiring, it’s best to hire an expert.
- Complex disassembly is required: Some oven designs make it challenging to access internal components. If the repair requires significant disassembly beyond your comfort level, a technician has the specialized tools and experience.
- Control board replacement is suspected: Replacing the main control board is an intricate and costly repair. A professional can accurately diagnose if the board is indeed the issue and perform the replacement correctly, often with a warranty on their work.
- Safety concerns arise: If you notice any burning smells, smoke, or unusual electrical noises from your oven, or if the error code is accompanied by other dangerous symptoms, stop troubleshooting immediately and call a professional. Your safety is paramount.
Conclusion
Encountering an F1 or F3 error code on your oven doesn’t necessarily spell the end for your appliance. These codes often point to issues with the temperature sensor or the control board, which, in many cases, can be addressed with careful DIY troubleshooting. By understanding the meaning behind these alerts and following systematic steps, from a simple power cycle to inspecting wiring and potentially testing the sensor, you can often diagnose and even fix the problem yourself. However, remember the importance of safety and recognize when a repair extends beyond your skill level. Prioritizing your well-being and knowing when to enlist the expertise of a professional technician will ensure your oven is back to baking and roasting safely and efficiently. Which troubleshooting step will you try first to get your oven back in working order?
Frequently Asked Questions
Can F1 and F3 oven error codes appear together?
Yes, it is possible for F1 and F3 error codes to appear together or in sequence. Since both codes often relate to the oven’s temperature sensing system or the main control board, a single underlying fault, such as a severely damaged temperature sensor or a malfunctioning control board, could trigger both alerts.
How much does an oven temperature sensor replacement cost?
The cost of an oven temperature sensor replacement part typically ranges from $20 to $100, depending on the oven brand and model. If you hire a professional technician, the total cost, including labor, could be anywhere from $100 to $300, or more, depending on the service rates in your area.
Is it safe to use an oven with an F1/F3 error?
No, it is generally not safe to use an oven displaying an F1 or F3 error code. These codes often indicate a problem with temperature regulation or the control system, which could lead to overheating, inconsistent cooking, or other electrical hazards. It’s best to troubleshoot and resolve the issue before using the oven again.
How can I prevent oven error codes?
Regular maintenance, such as keeping the oven clean and ensuring proper ventilation, can help. Avoid slamming the oven door, which can damage door sensors or wiring. If your oven has a self-cleaning cycle, ensure the door is properly latched. Promptly address any minor operational issues to prevent them from escalating.
Where is the temperature sensor located in my oven?
The oven temperature sensor, or probe, is typically located inside the oven cavity. It usually appears as a thin, metallic rod extending a few inches from the back wall, side wall, or sometimes the top of the oven interior. Its exact position can vary slightly depending on your oven’s make and model.